Pride🏳🌈 and Predju(dice)🎲 and Custom UV Coordinates 📈: a Three.js and GLSL story
Thus far in our series we have created custom GLSL shaders that animated numbers, and outlined faces -- one a phong shader and one a toon shader. In this installment we go into more depth on our multi-uv coordinate set models and then even edit them in blender. All to make some rainbow banded dice!
On the occasion of pride I had the light bulb moment that using the some uv coordinates I had used for the face outlines on the toon die set, I could "easily" get a pride flag on every face of the die. Instead of the outline, my "outline map" would be the flag, and I would change the uniform name in the GLSL because #codingBestPractices.
However in programing nothing is ever easy and one never stops at the simple. Buckle in; this was quite the ride.
🏳🌈Turning outline maps into face maps
The first step was porting over the outline map code over from the toon shader into the phong shader. It really wasn't that hard, copy-paste is copy-paste.
    #define USE_UV
+   varying vec2 vUvOverlapped;
+   varying vec2 vUvPacked;
    uniform vec3 diffuse;
    uniform vec3 emissive;
    uniform vec3 specular;
    uniform float shininess;
    uniform float opacity;
    uniform float hiddenness;
    uniform sampler2D u_faceMap;
    uniform sampler2D u_numberMap;
    uniform vec3 number;
+   uniform vec3 face;
    #include <common>
    #include <packing>
    #include <dithering_pars_fragment>
    #include <color_pars_fragment>
    #include <uv_pars_fragment>
    #include <uv2_pars_fragment>
    #include <map_pars_fragment>
    #include <alphamap_pars_fragment>
    #include <alphatest_pars_fragment>
    #include <aomap_pars_fragment>
    #include <lightmap_pars_fragment>
    #include <emissivemap_pars_fragment>
    #include <envmap_common_pars_fragment>
    #include <envmap_pars_fragment>
    #include <cube_uv_reflection_fragment>
    #include <fog_pars_fragment>
    #include <bsdfs>
    #include <lights_pars_begin>
    #include <normal_pars_fragment>
    #include <lights_phong_pars_fragment>
    #include <shadowmap_pars_fragment>
    #include <bumpmap_pars_fragment>
    #include <normalmap_pars_fragment>
    #include <specularmap_pars_fragment>
    #include <logdepthbuf_pars_fragment>
    #include <clipping_planes_pars_fragment>
    void main() {
        #include <clipping_planes_fragment>
        vec4 diffuseColor = vec4( diffuse, opacity );
        ReflectedLight reflectedLight = ReflectedLight( vec3( 0.0 ), vec3( 0.0 ), vec3( 0.0 ), vec3( 0.0 ) );
        vec3 totalEmissiveRadiance = emissive;
        #include <logdepthbuf_fragment>
        #include <map_fragment>
+
+       vec4 u_faceMapIn = texture2D( u_faceMap, vUvOverlapped );
+       // adjust color of face
+       u_faceMapIn.rgb *= face;
+       // overlay face map over diffuse color or map
+       diffuseColor.rgb = mix(diffuseColor.rgb, u_faceMapIn.rgb, u_faceMapIn.a);
+
        vec4 u_numberMapIn = texture2D( u_numberMap, vUv );
        // adjust color of numbers
        u_numberMapIn.rgb *= number;
        // overlay number map and apply hiddeness
        diffuseColor.rgb = mix(diffuseColor.rgb, u_numberMapIn.rgb, u_numberMapIn.a * (1.0 - hiddenness));

        #include <color_fragment>
        #include <alphamap_fragment>
        #include <alphatest_fragment>
        #include <specularmap_fragment>
        #include <normal_fragment_begin>
        #include <normal_fragment_maps>
        #include <emissivemap_fragment>
        // accumulation
        #include <lights_phong_fragment>
        #include <lights_fragment_begin>
        #include <lights_fragment_maps>
        #include <lights_fragment_end>
        // modulation
        #include <aomap_fragment>
        vec3 outgoingLight = reflectedLight.directDiffuse + reflectedLight.indirectDiffuse + reflectedLight.directSpecular + reflectedLight.indirectSpecular + totalEmissiveRadiance;
        #include <envmap_fragment>
        #include <output_fragment>
        #include <tonemapping_fragment>
        #include <encodings_fragment>
        #include <fog_fragment>
        #include <premultiplied_alpha_fragment>
        #include <dithering_fragment>
    }
Once I had that, throwing the pride flag on the faces as as simple as adding a decision for the "u_outlineMap" in the texture array.
  {
    "id": "dddice-pride",
    "version": "1.0.0",
    "api_version": "1.0",
    "name": "\uD83C\uDFF3️\u200D\uD83C\uDF08",
    "description": "Love is Love",
    "label": {
      "color": "#000000",
      "background_color": "#ffffff"
    },
    "frag_shader": "shader.frag",
    "vert_shader": "shader.vert",
    "textures": [
     {
       "binding": "u_numberMap",
       "src": {
         "d4": "standard.png",
         "d6": "standard.png",
         "d8": "standard.png",
         "d10": "standard.png",
         "d12": "standard.png",
         "d20": "standard.png",
         "d10x": "standard_d10x.png"
       }
+     },
+     {
+        "binding": "u_faceMap",
+        "src": "pride.png"
      }
    ],
    "uniforms": {
      "diffuse": {
        "type": "color",
        "value": {
          "r": 1.0,
          "g": 1.0,
          "b": 1.0
        }
      },
+    "face": {
+       "type": "color",
+       "value": {
+         "r": 1.0,
+         "g": 1.0,
+         "b": 1.0
+       }
      },
      "number": {
        "type": "color",
        "value": {
          "r": 0.0,
          "g": 0.0,
          "b": 0.0
        }
      },
      "specular": {
        "type": "color",
        "value": {
          "r": 0.1,
          "g": 0.1,
          "b": 0.1
        }
      },
      "shininess": {
        "type": "f",
        "value": 30.0,
        "min": 0,
        "max": 100
      }
    }
  }
However this resulted in less than amazing results. The rainbow was there, sure, but it was facing all which ways and didn't look polished!

🎲Modifying the model files
Take a look at that d8 tho, despite the numbers being miss aligned with the rainbow stripes, that purple line right through the middle is 👩🍳💋 If only I could rotate all the numbers around, and the stripes and get all the dice looking clutch?
Oh wait I can! That degree in computer graphics is worth something after all! Let's fire up blender and import our fbx files right into blender!
You can get those from our API, or right here in this zip.
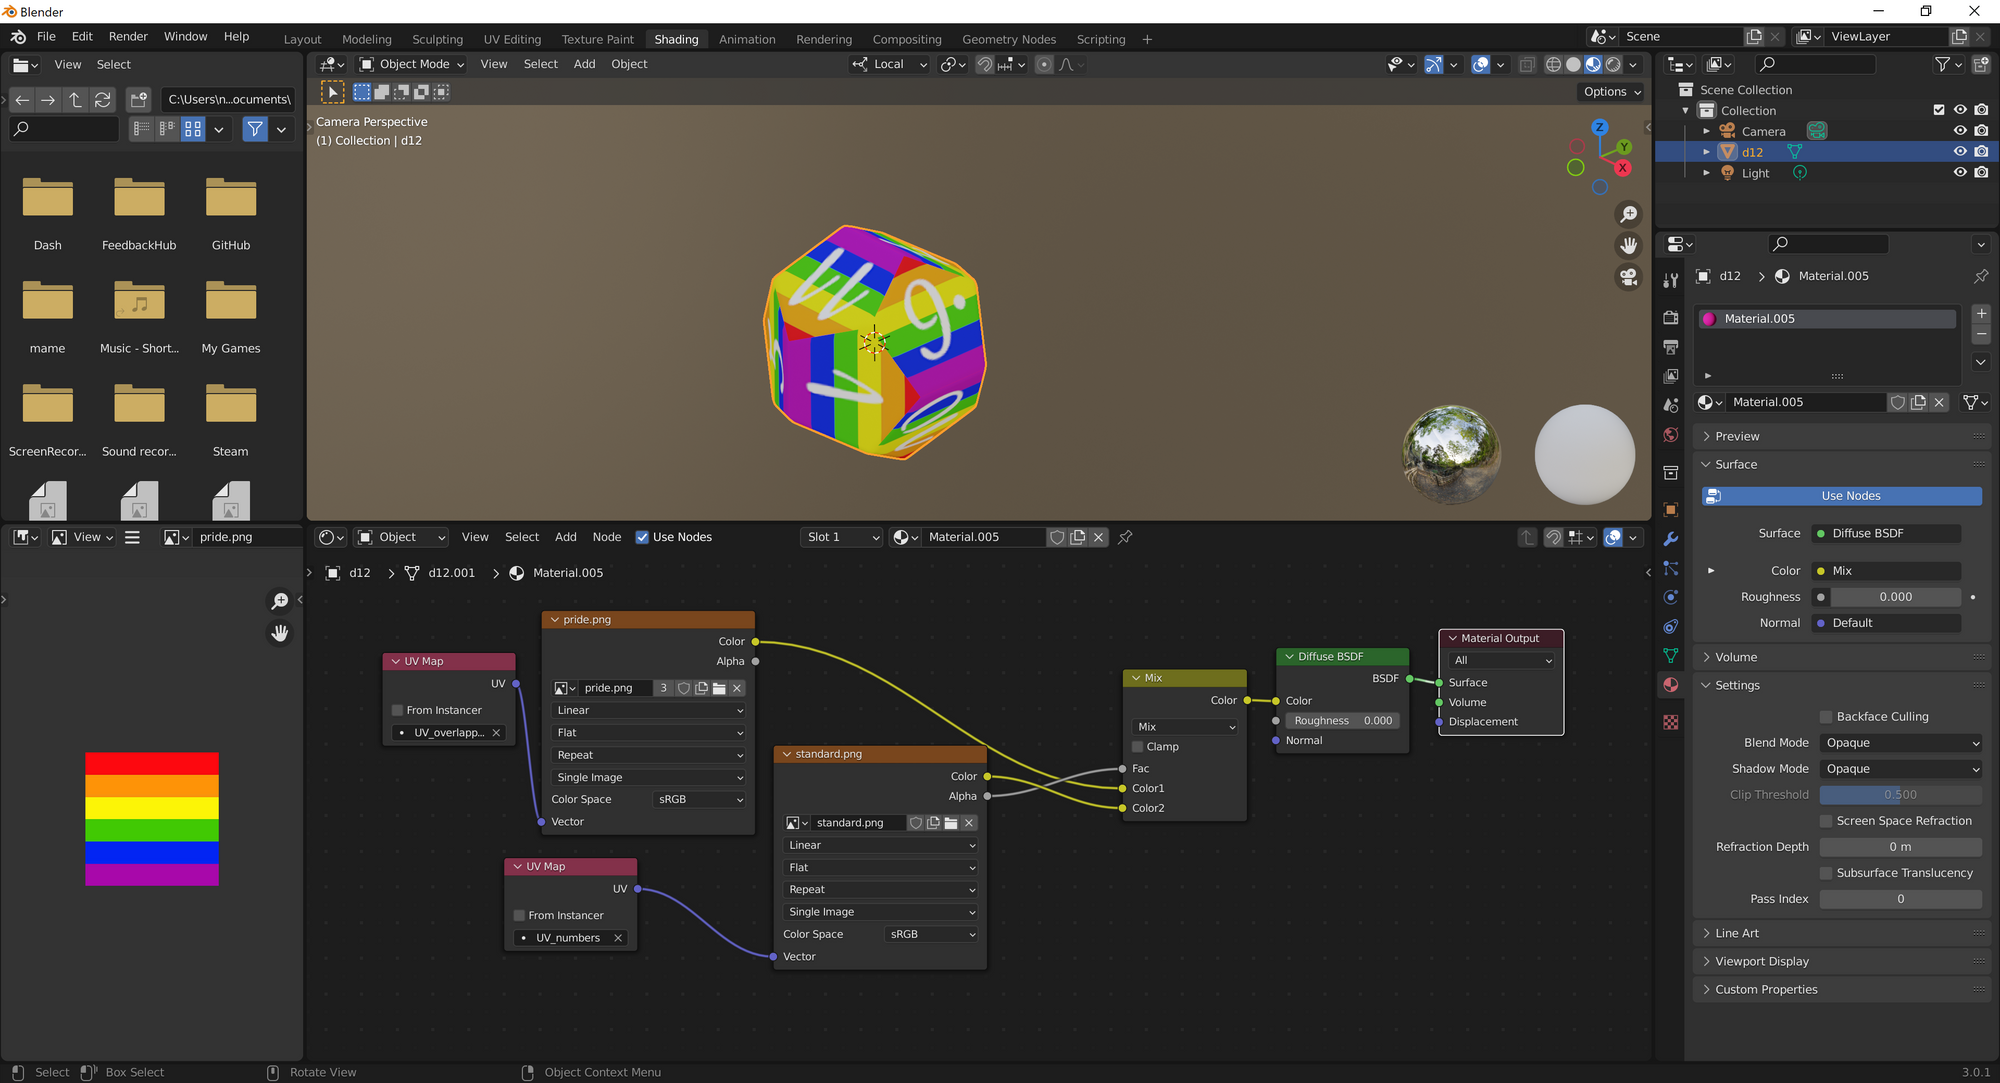
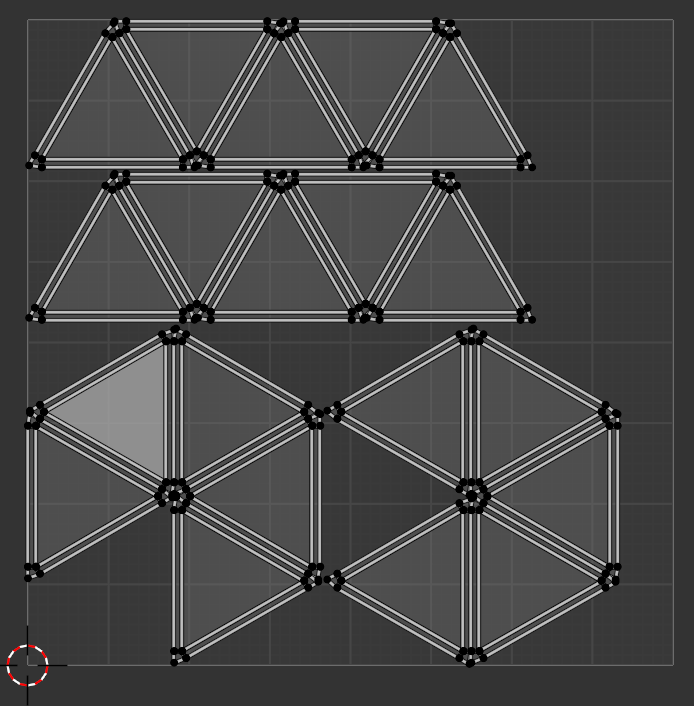
The first challenge with blender is that we need to recreate our shader, or at least near enough to see our numbers overlaid on our rainbow stripes to give us the visuals we need to edit the uv coordinates. To refresh everyone's memory all our models have 3 sets of coordinates: numbers, overlapped and packed. Numbers we use for the number maps. Overlapped we used for the outlines of the toon, and the stripes for this one, and packed we haven't demoed yet, but it's intended for diffuse or bump maps that need to connect well at the seams.
Building a node based shader in blender is outside the scope of this article, I'm sure there is a tutorial somewhere, but screenshoted below is the shader pipeline I implemented to visualize the number/stripe orientations. At a high level, there are two textures, pride.png (the stripes) and numbers.png (the numbers). Each is attached to the corresponding uv coordinates, overlapped and numbers, respectively. Those both go into a mix node, then into the diffuse property of the shader. And the final step is to attach this to the model as the surface shader.

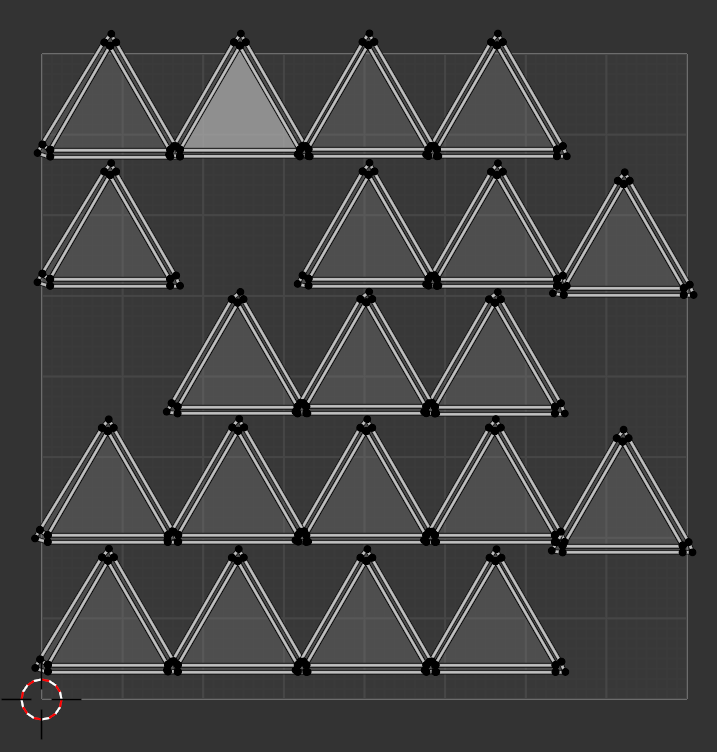
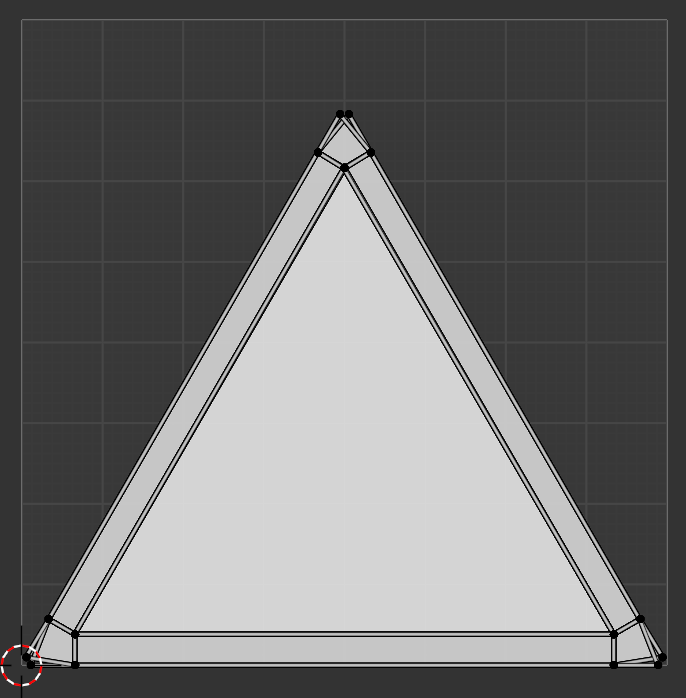
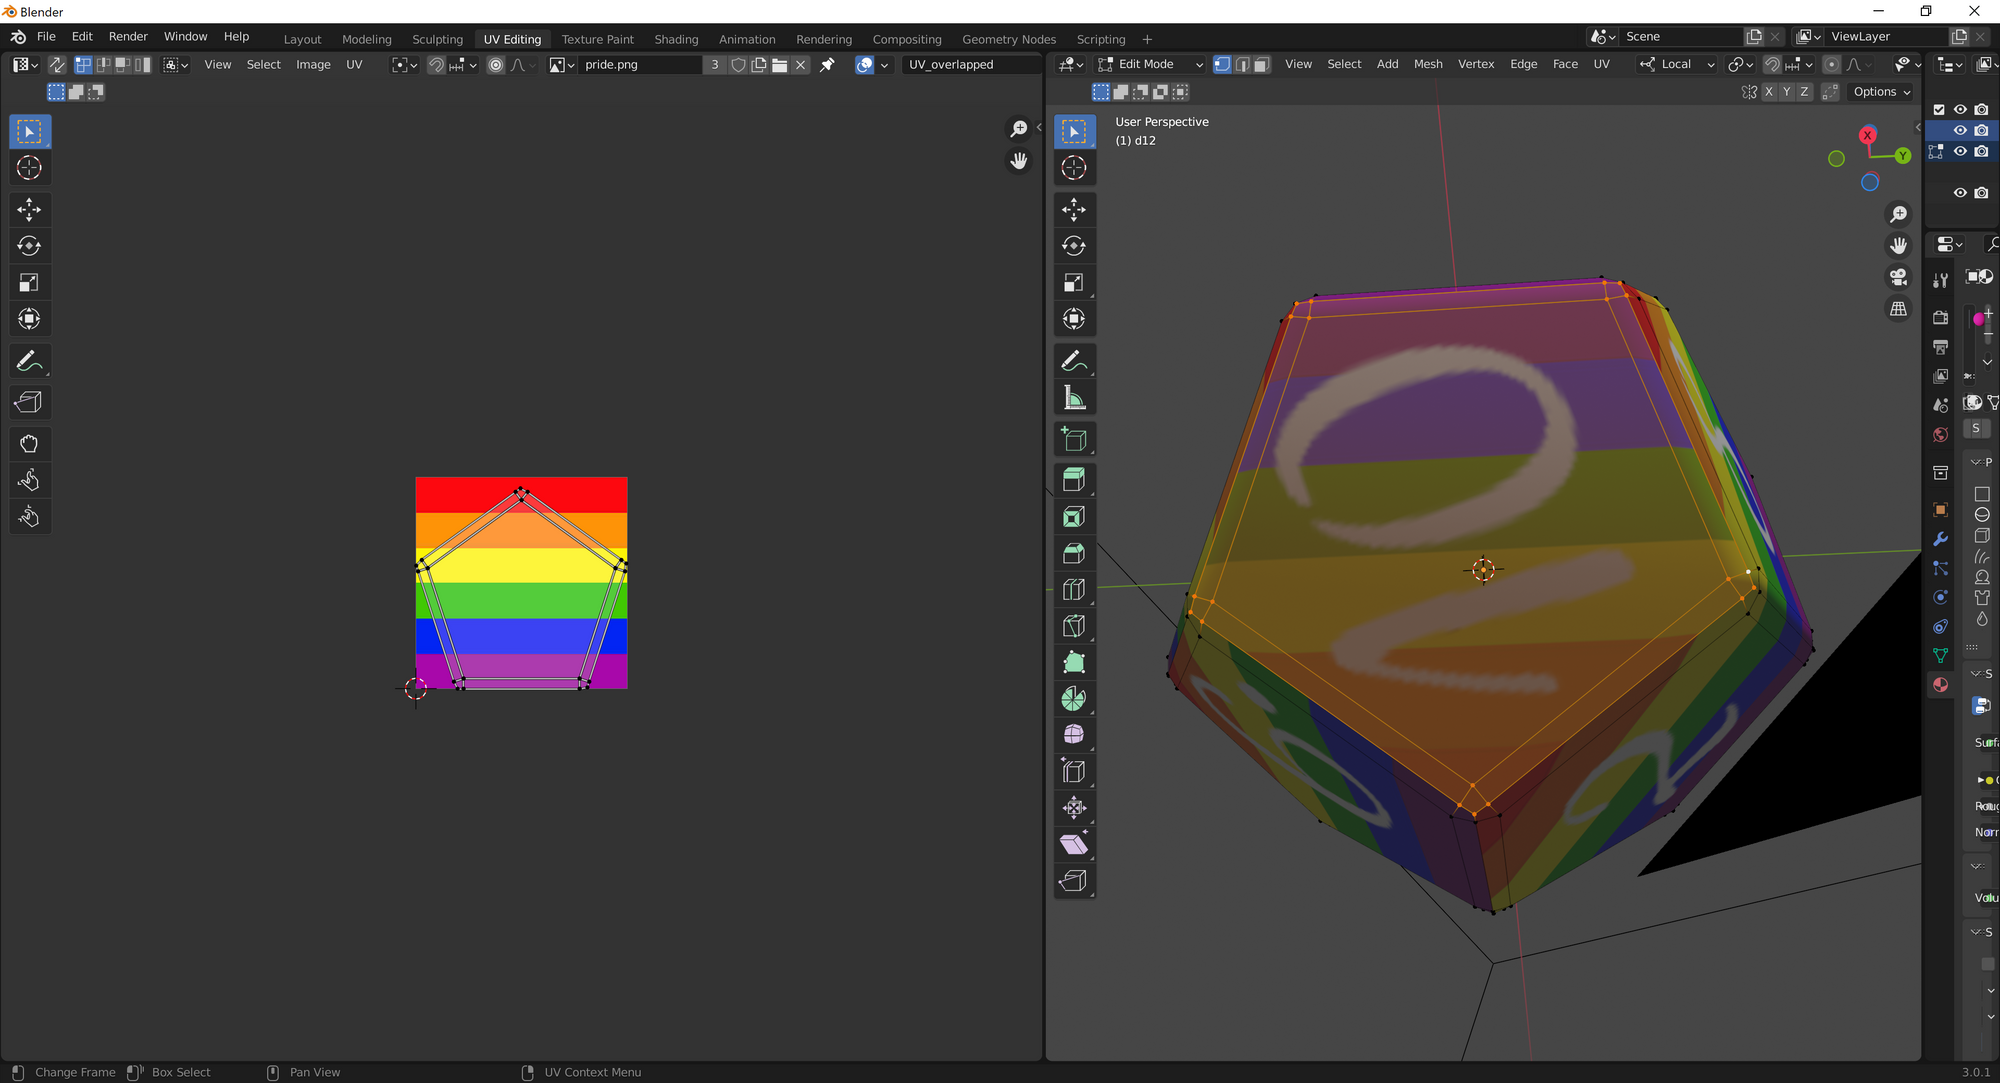
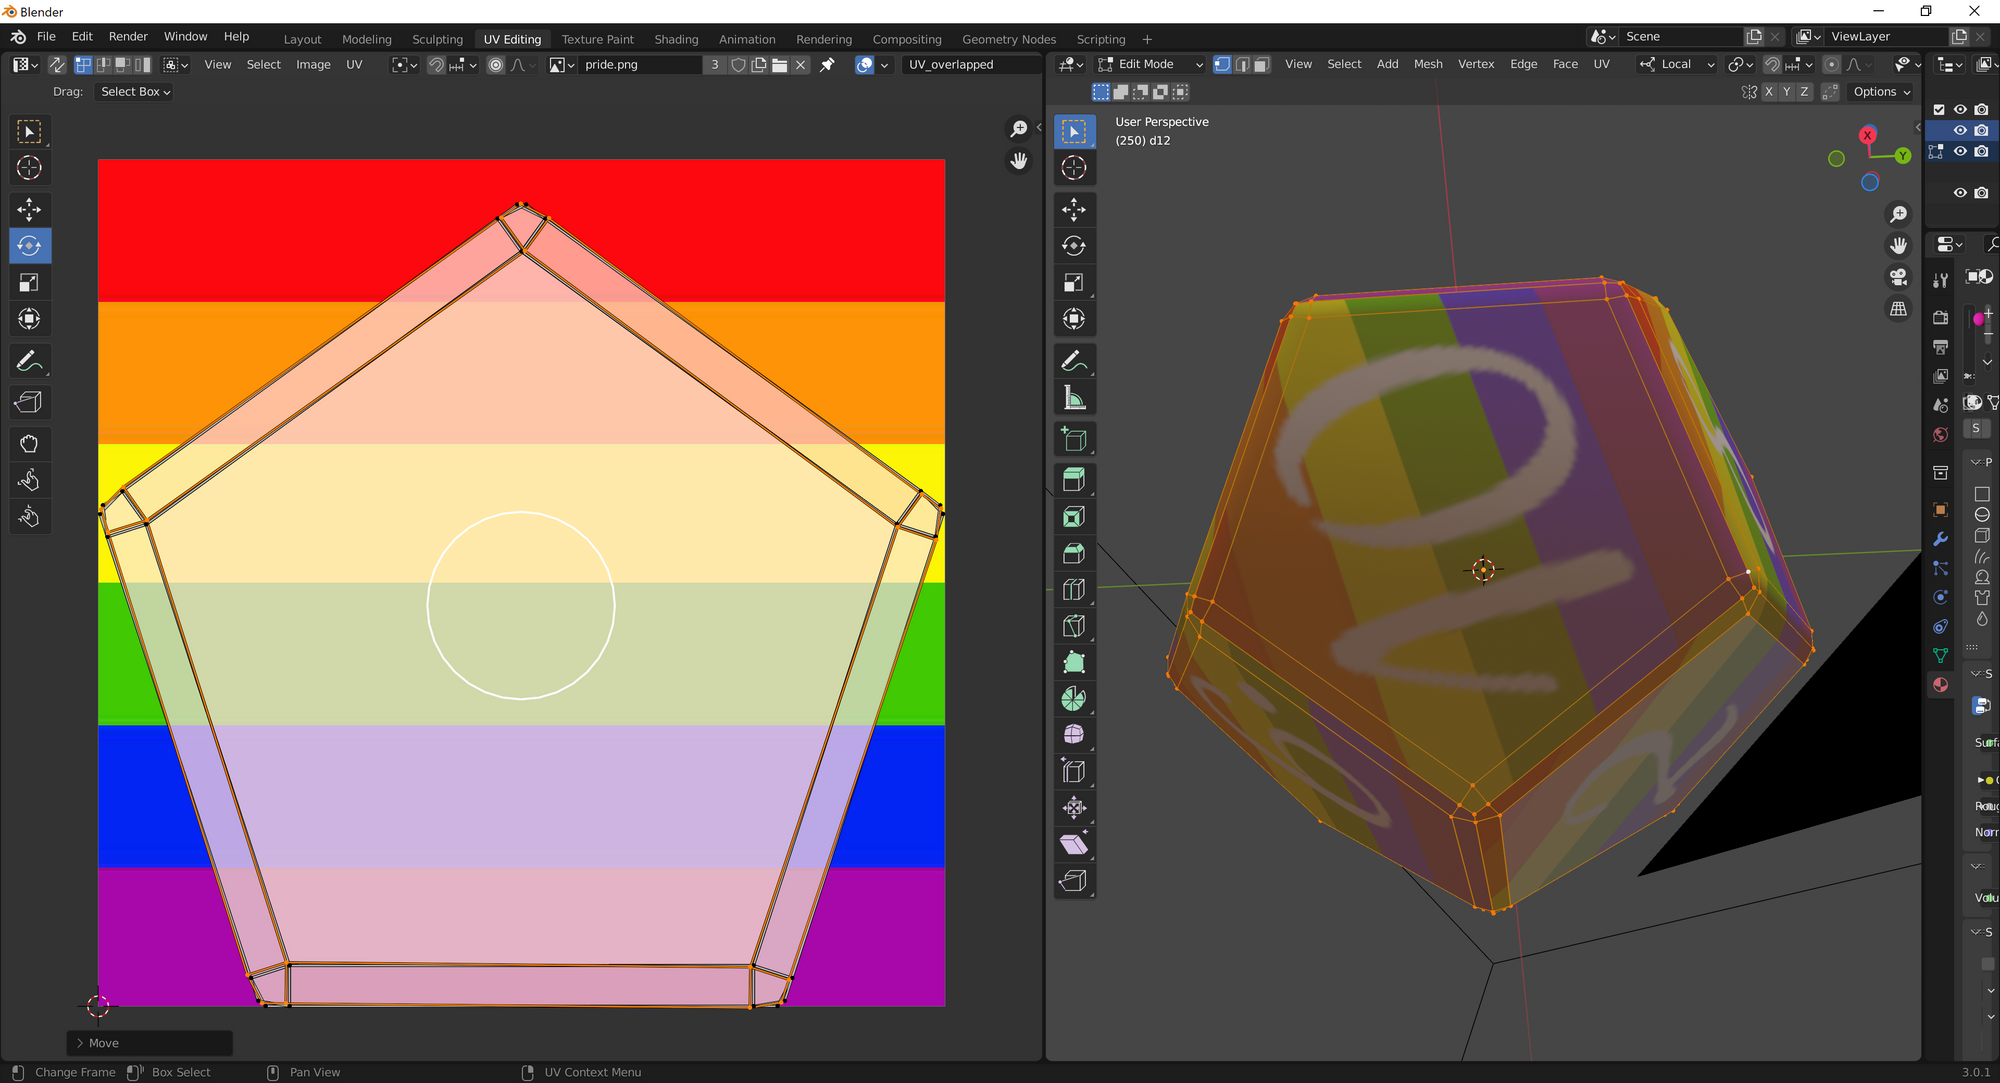
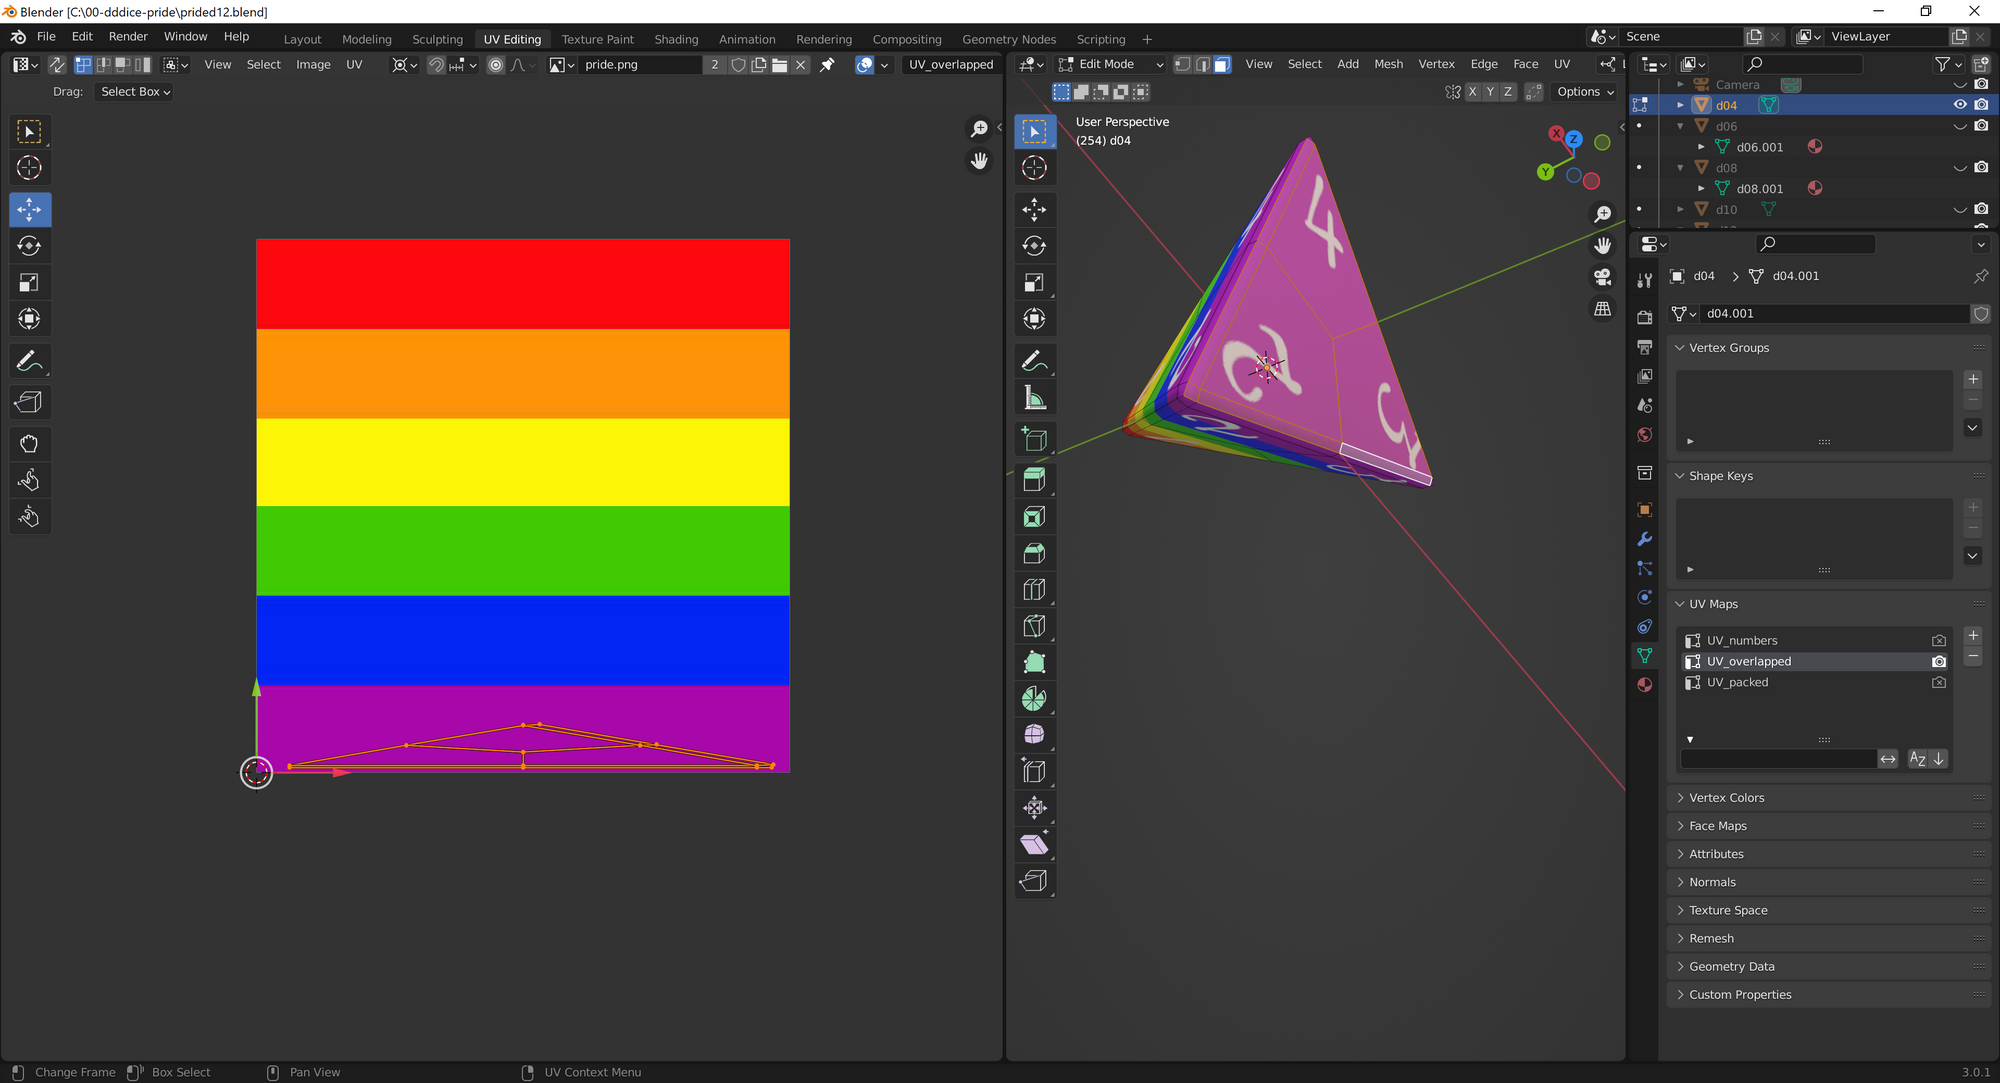
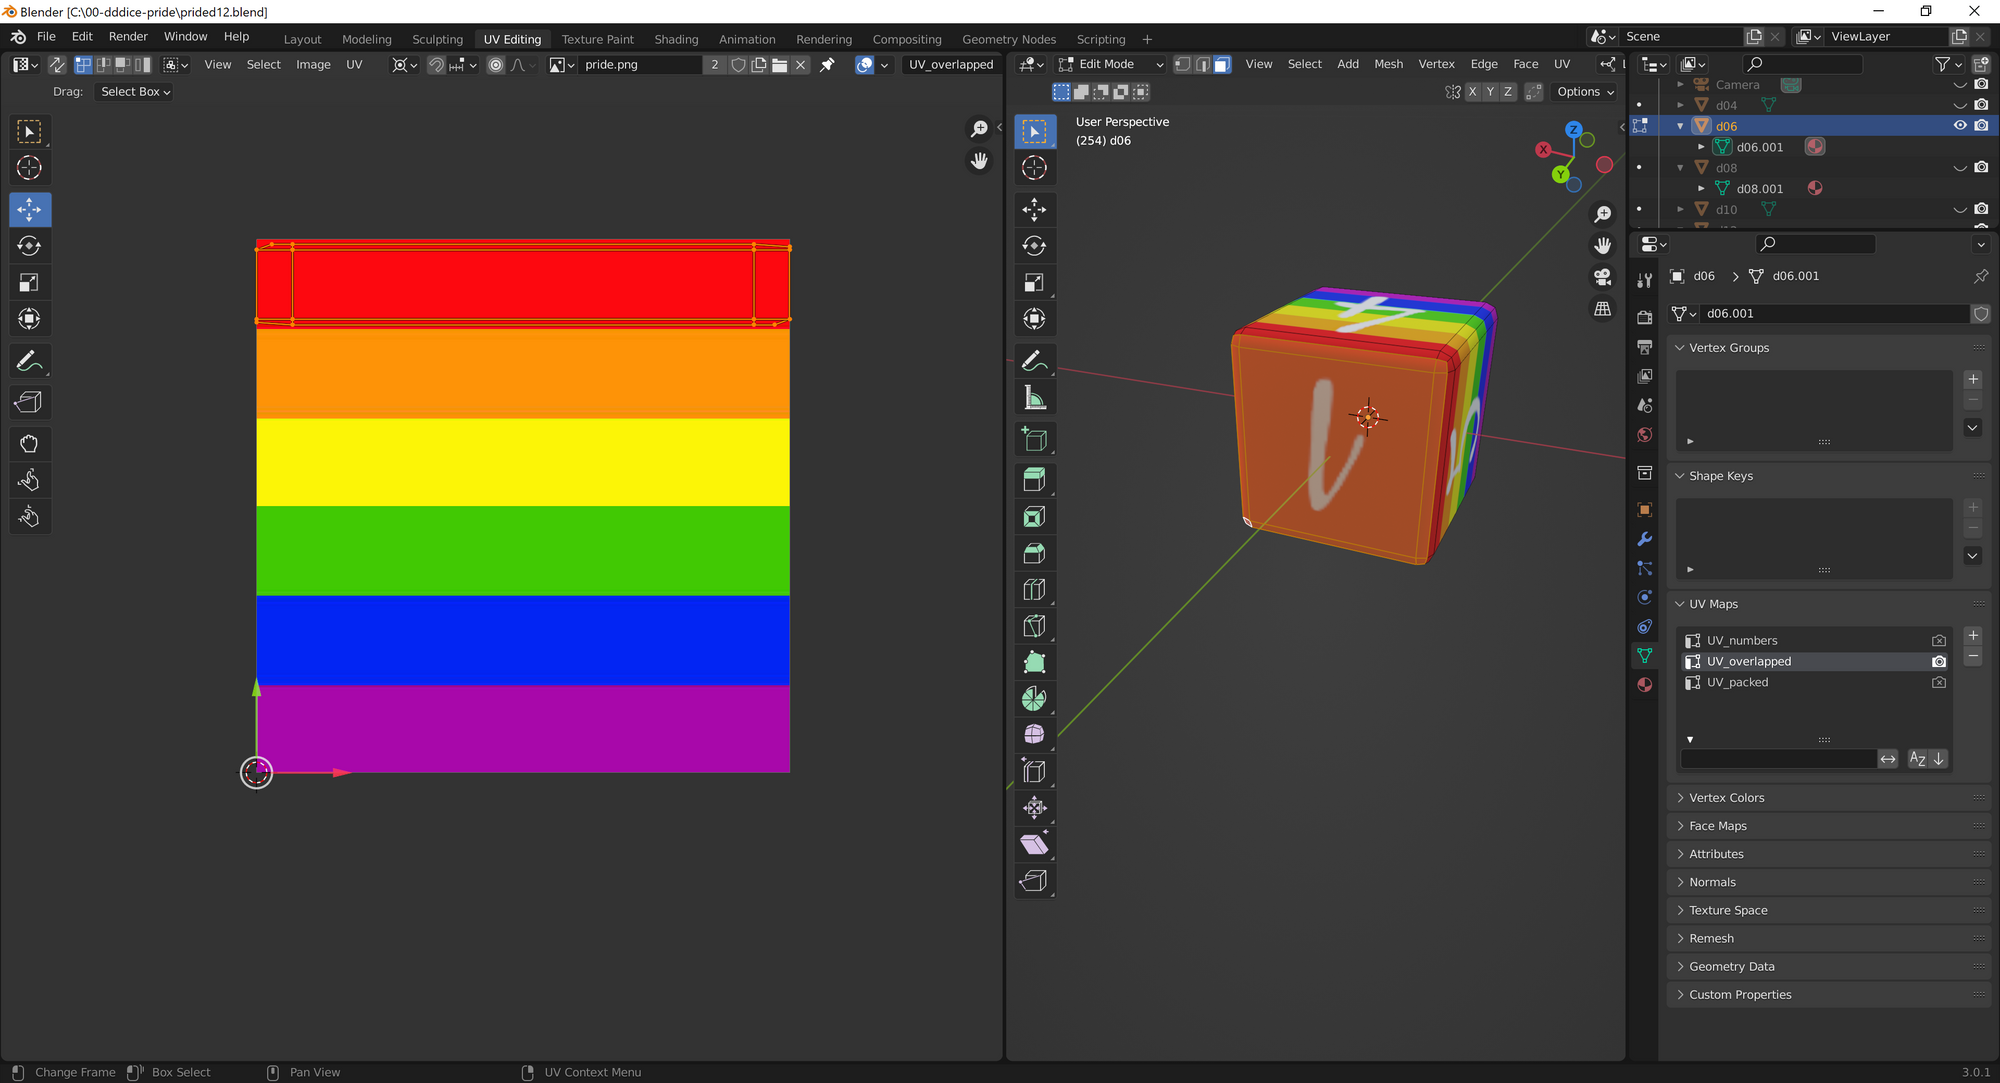
📈Updating the UV coordinates
Now that we have that, we can edit the uv coordinates in blenders uv editor. This was fairly straightforward. Select an offending face of the die in the model pane. Then choose either the overlapped or numbers uv to edit. Select the points a second time, but this time in the uv editor and rotate rotate rotate! After this I got fancy, and I squished one of the faces of the d4 so the whole bottom face was purple. Then did the same to the 1 and 6 of the d6. Aligned the stripes on the d20 for maximum beauty.
The final step is referencing the new models from the manifest file. Just add this in:
{
...
  "meshes": {
    "d4": "d04.fbx",
    "d6": "d06.fbx",
    "d8": "d08.fbx",
    "d10": "d10.fbx",
    "d10x": "d10.fbx",
    "d12": "d12.fbx",
    "d20": "d20.fbx"
  },
...
}
And then upload it, models and all with our API.
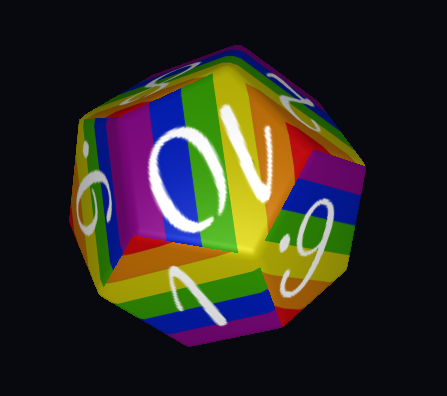
After all that hard work, this is what we are left with, rainbow dice, with nicely aligned stripes, read to roll, live with your party!

If you're interested in joining our growing community, join our Discord, follow us on Twitter, join the subreddit, and stay tuned for more updates.