How to make your dice remix friendly using emissive maps

I'm sure some of you have seen a cool looking dice set, but thought it would look better with different colours. Though, when you try to remix it you find that the set was made using a coloured texture background, and there's only so much you can do with the colour settings.
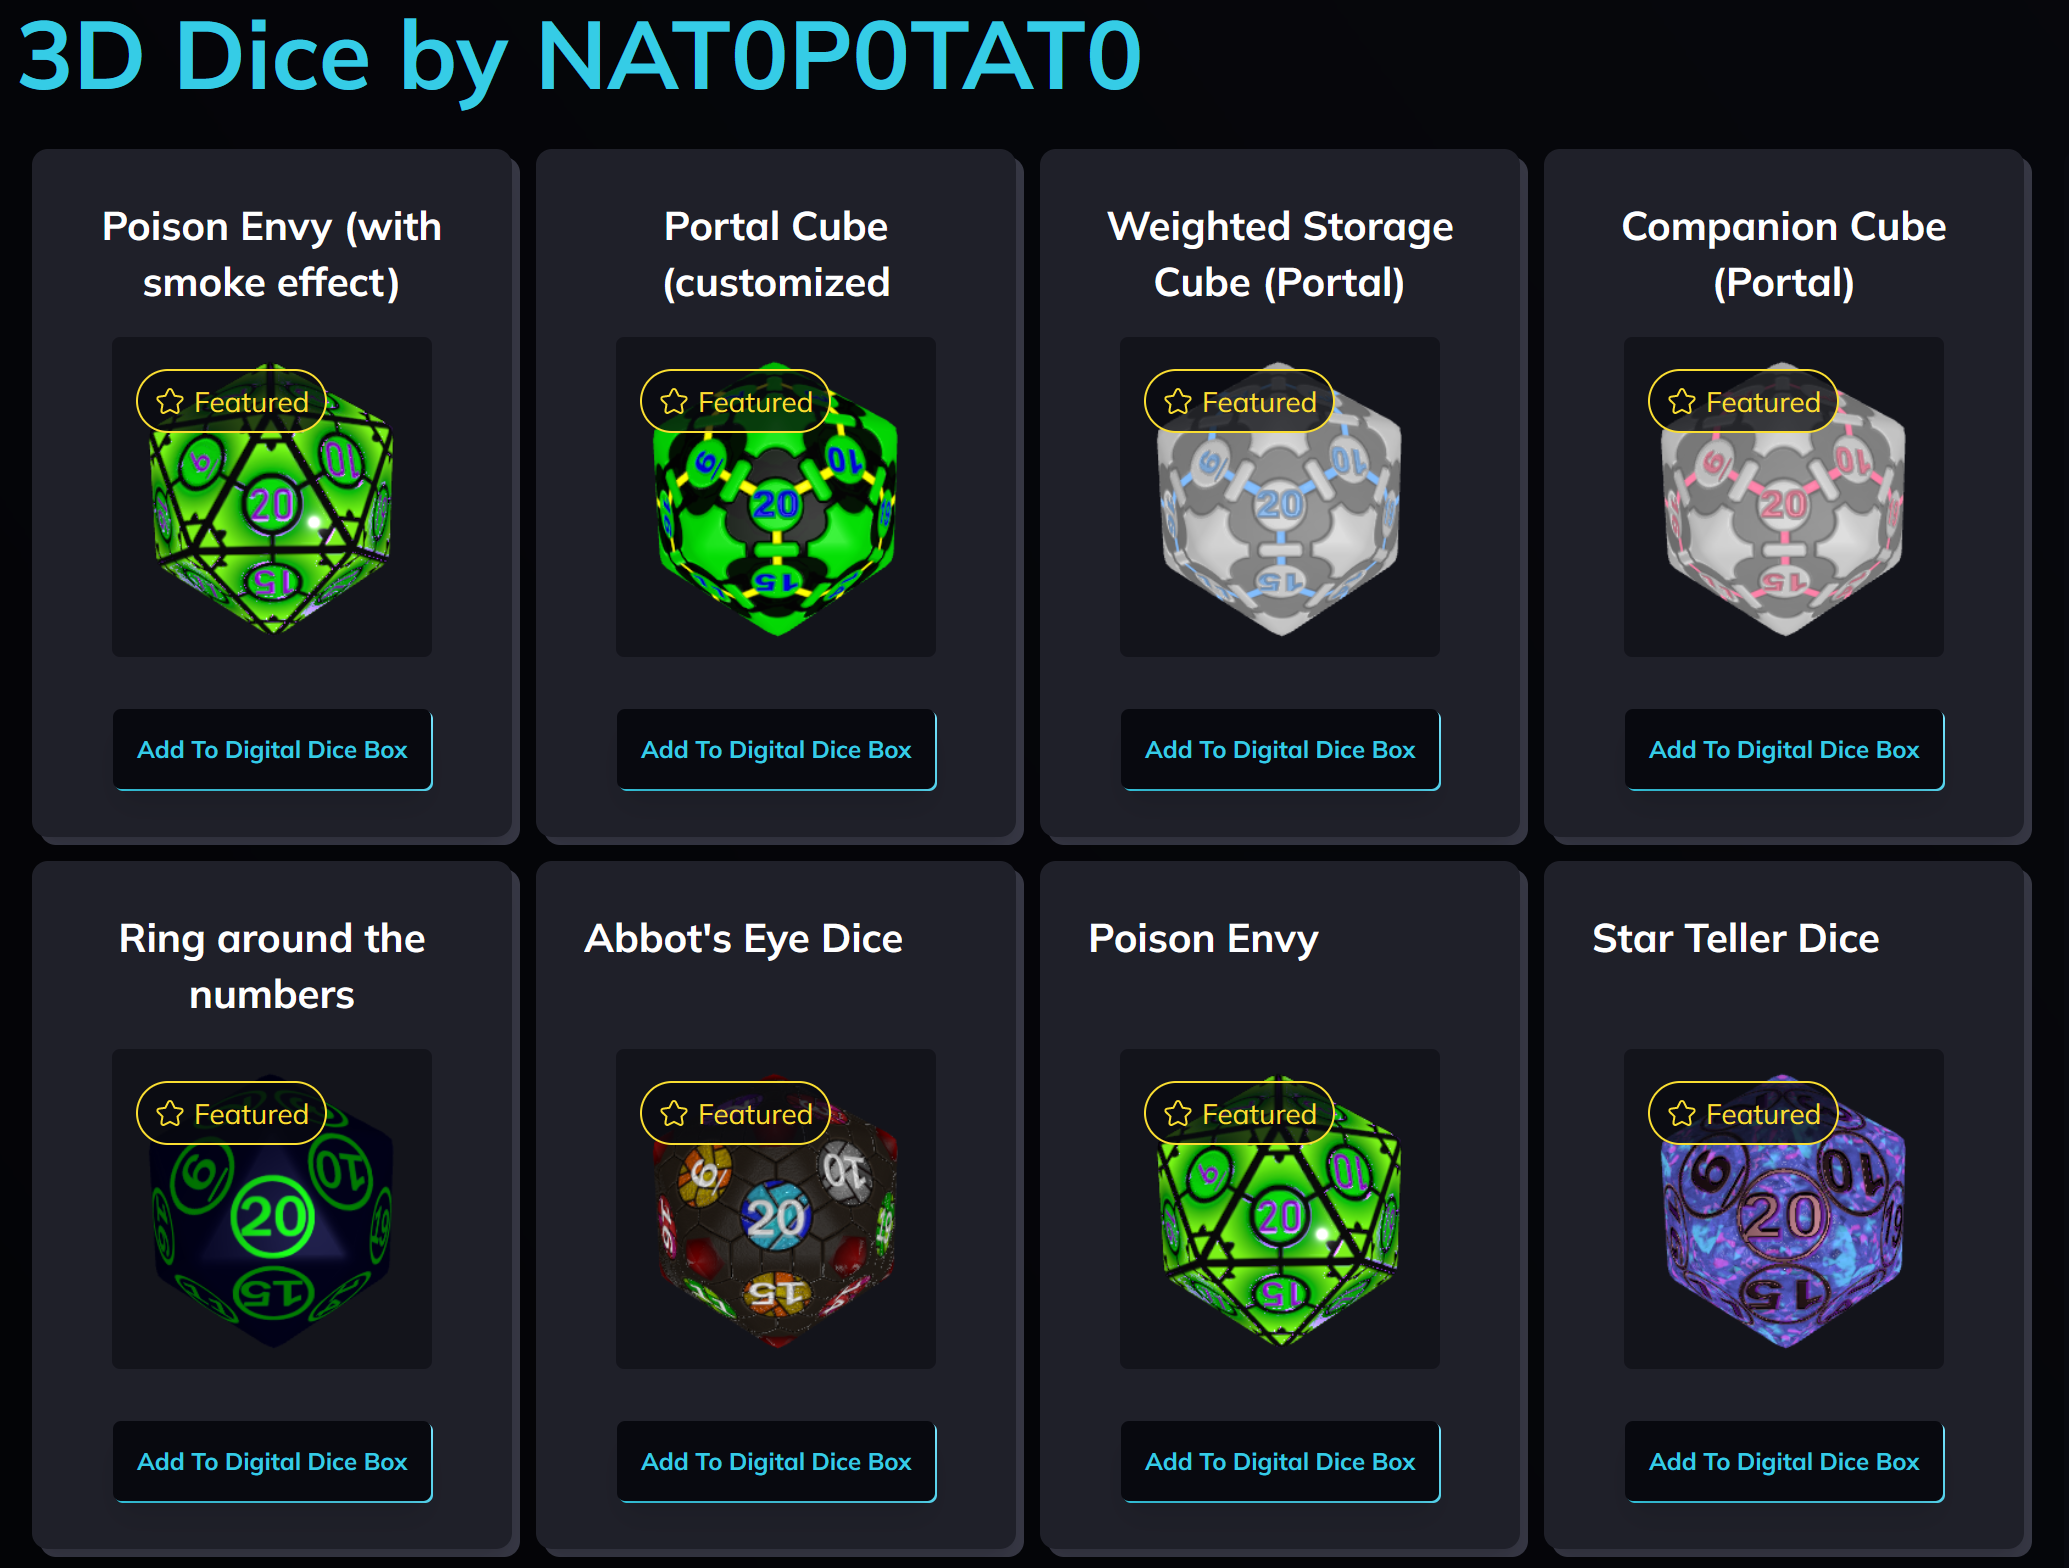
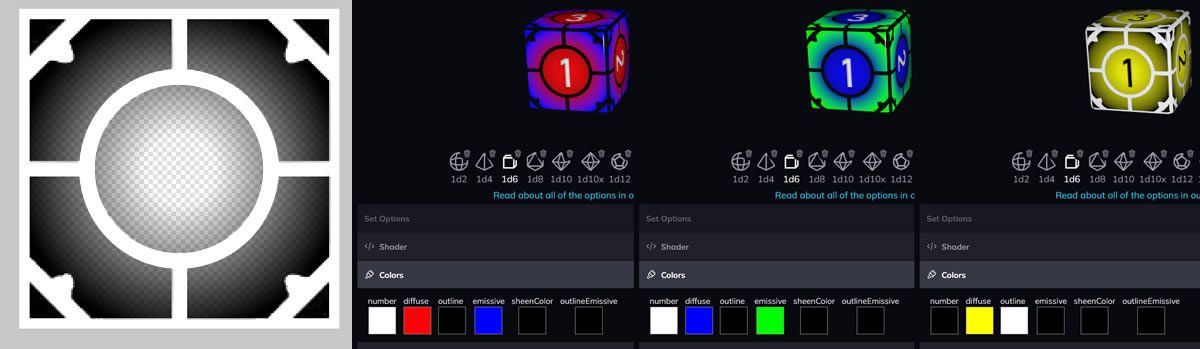
Here's an example of what I mean, this is an old remix of my Poison Envy set that is still using a coloured texture, I've given it a red colour filter and the center of the dice has turned black, not red, why is that?
🖤 Why so black?
It's to do with how the colour settings work. The diffuse colour is like painting, or printer ink. It doesn't add colour, it subtracts it. In other words, as far as light is concerned, it's actually the opposite colour being removed.
Think of printing on paper. If you mix yellow ink and cyan ink you get green, because the opposite of yellow is blue and the opposite of cyan is red, so you're taking away blue and red from the white paper, leaving green.
So in this case, by adding a red filter we've actually removed green and blue, there's not much blue in there anyway, and green - green = black.
The outer edges of the dice appear red as the underlying texture has a green to yellow transition and yellow is red + green, so removing green from the yellow colour means we still have red left.
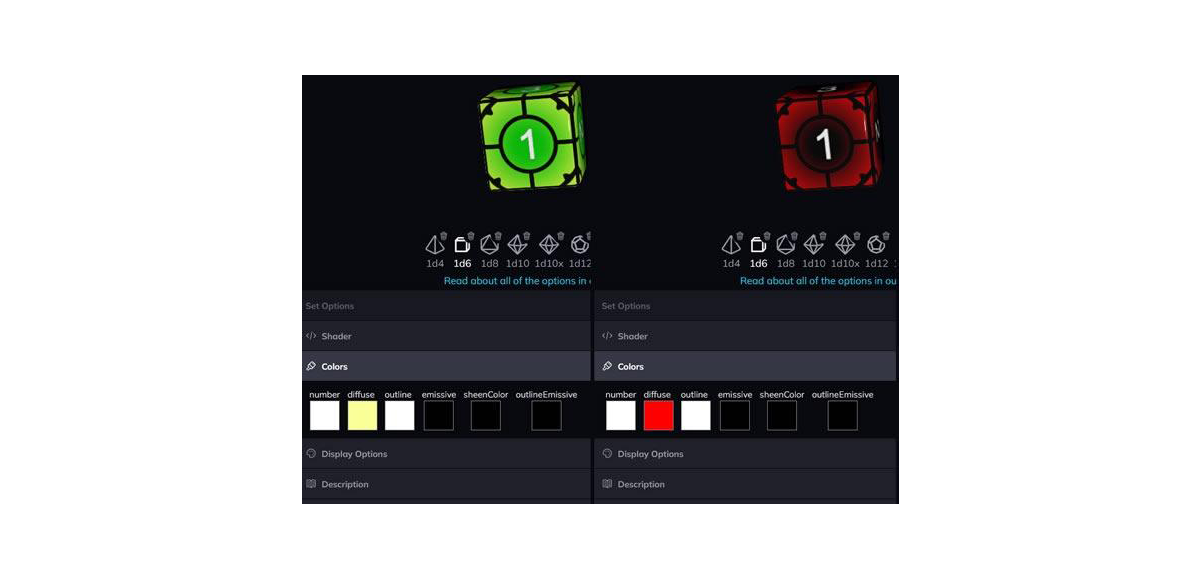
🔦 Using emissive colours
So what if we want to do the opposite and add colour? That's what the emissive colour settings are for! They add colour like a light shining onto the dice. When a red emissive colour is set it turns the dice yellow, not red, and also turns the black borders red, we don't want that, and if we apply both?
Not ideal 😢. If the dice only had 1 or 2 colours, it wouldn't be so bad, but if there's more, and especially if there are gradients, it gets a bit more tricky. How do we resolve this? — outline textures and emissive maps!
🍴 Make remix friendly textures
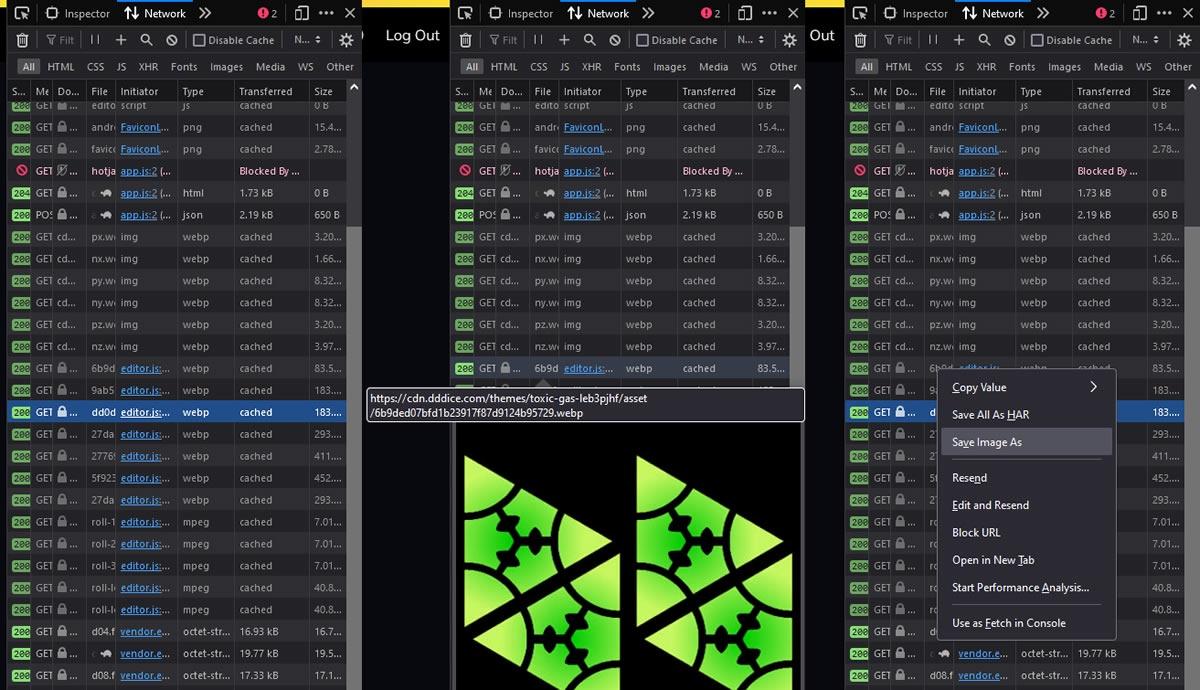
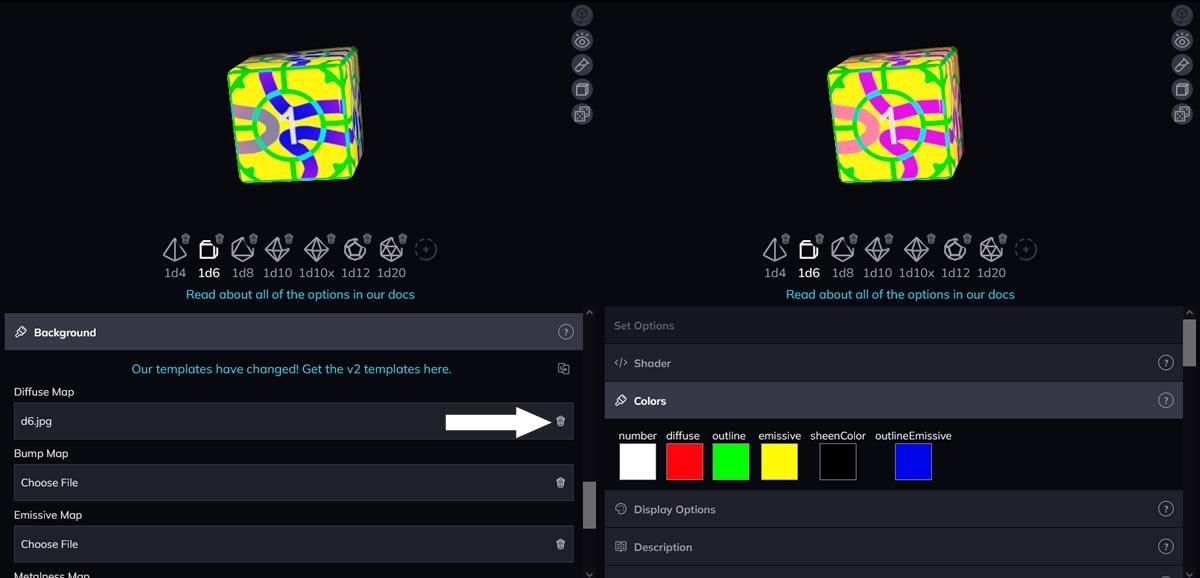
The first thing is to make an outline texture. This texture is layered on top of the background texture, much as one would do in an image editor like photoshop. Therefore, the part we want to include here is the part that is not affected by the colour gradient in the original texture. We could also include a part of the dice that is a solid colour that is different from the rest of the die, or the metal part if you're using metal. For the poison envy dice in this example, it's the black border.
We can take the texture, crop it to a single side if it's a full dice texture, modify it so that only the border is visible, then colour it white.
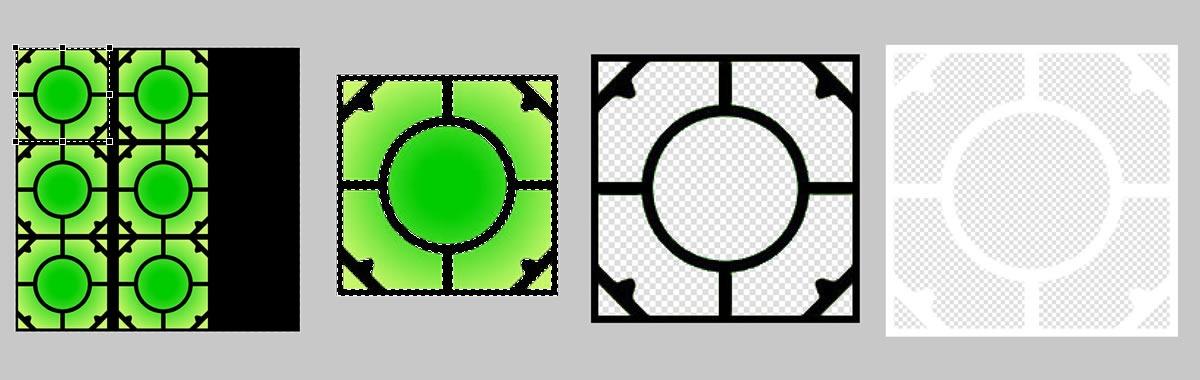
When we set this texture as the "Diffuse Map" in the "Face Outline" section we can now see the border. When changing the outline colour setting from the colour menu, you'll see that we can now control the colour of the border independently of the rest of the die. The emissive colour is still being applied over it, however – green colour is having red added to it. We don't want that.
We could remove the emissive colour, but then the center of the die appears black again, so there's still a bit more work to do.
🦸♀️ Emissive map to the rescue
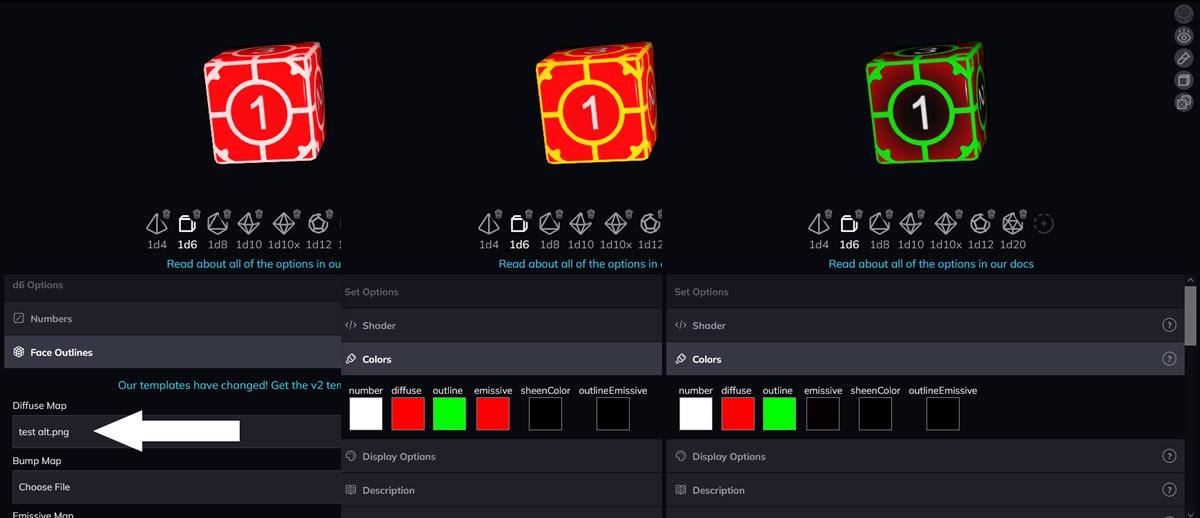
Next thing we need is an emissive map, this is an image that controls how strongly the emissive colour is applied to the dice.
For now let's just start with a copy of the outline map we used above and colour it black instead of white, when we add it as the “Emissive Map” in the “Face Outline” section, the border now shows up as green even with both of the emissive colours set to full red.
So what happened? And wait, two different emissive colour options?
There are two things that are important in the emissive maps: transparency and brightness. Any part of the emissive map that is black will prevent any emissive colour from being applied. Black means “no light here”.
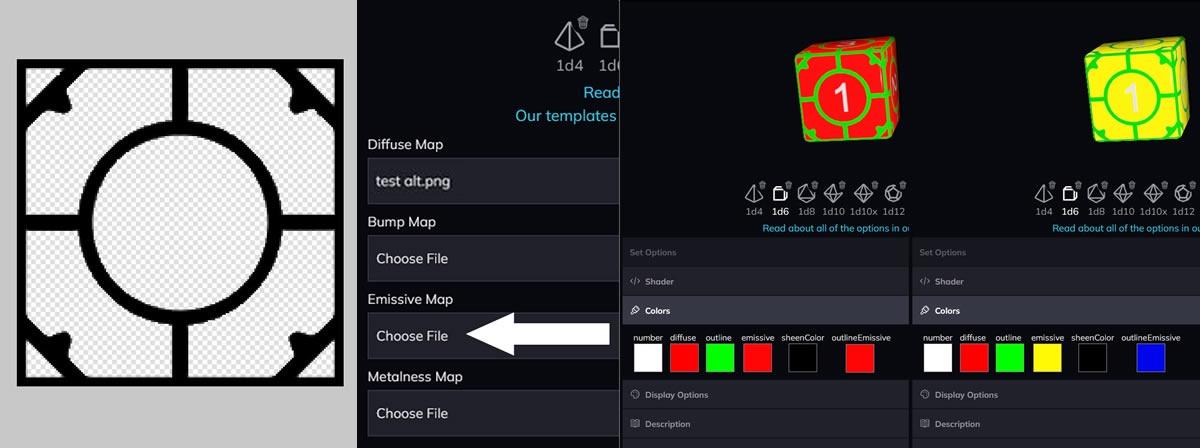
Any part that is transparent, will apply the base emissive colour, and any part that is white will apply the outlineEmissive colour. Let's try setting those to 2 different colours and changing the emissive map just to demonstrate.
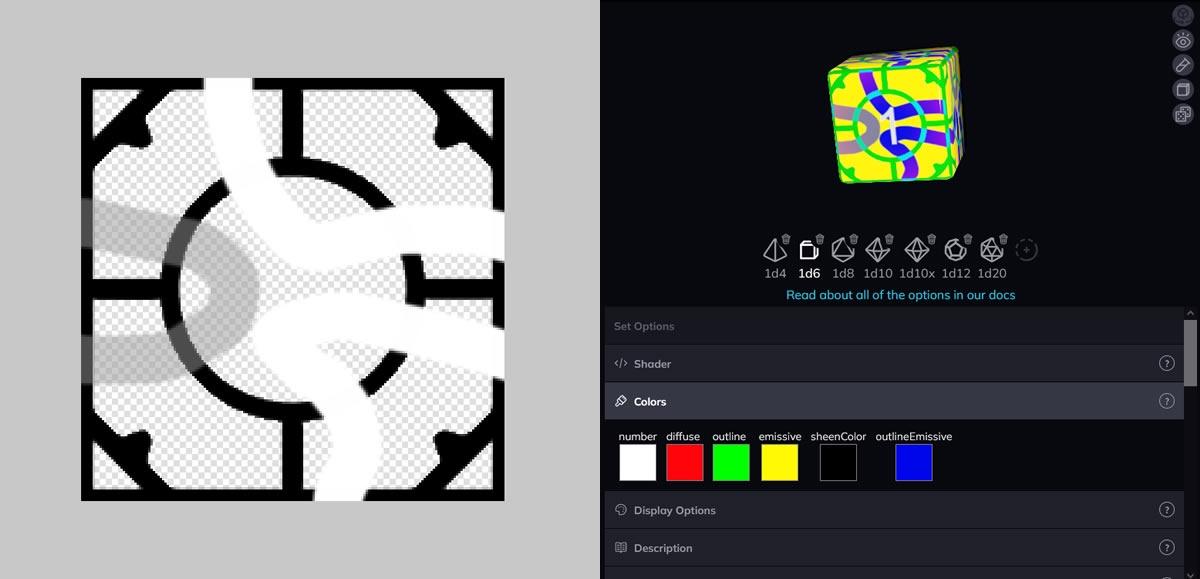
Let's also get rid of the coloured base background texture, as that is always adding green, now we can see more clearly how the colours are mixing, the white part of the map allowing the blue outlineEmissive colour to mix with the red diffuse colour, while the transparency allows the yellow emissive colour to cover the rest.
📦 Remixable colour gradients
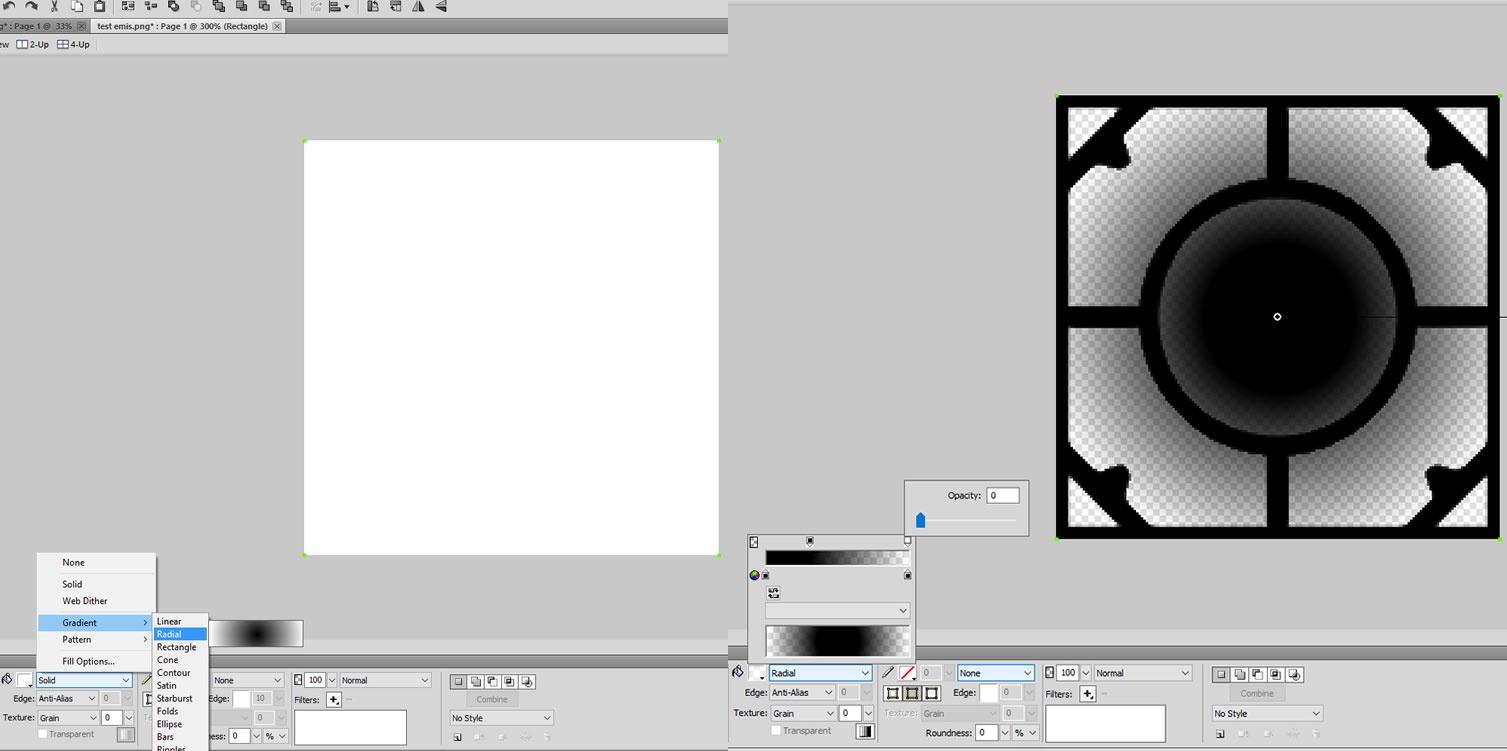
To get that center-to-edge gradient to be colour setting controlled, we need to make edits to the emissive map. Let's create a square and set its colour to a round gradient. We'll set the center colour to black and the edge to either transparent or white, depending on which colour setting we want to key into – transparent for base emissive, white for outline emissive. Layer this underneath the black layer for the border, then re-upload.
We can now see the red colour in the center transitioning to yellow at the edges. Now it's just a matter of adjusting the colour settings so see how remixable it really is! Of course if we're not happy with the gradient we can always adjust the emissive map.
🎨 Don't want the colours mixing?
As we can see there is some colour mixing happening. A blue emissive colour on a red diffuse colour results in magenta. If we want to go the extra mile and have the emissive colour be independent of the diffuse colour we need to modify and re-upload the outline map to prevent the colours from mixing too much.
We can achieve this by adding a radial gradient. Place this underneath the white border layer. Set the centre to transparent and the outer edge to black. The black colour in the map prevents the diffuse and outline colours from showing. This leaves only the emissive colours, allowing us to even use black as an emissive colour when usually setting an emissive colour to black would do nothing.
Once you're done with updating that one die in the set, you can repeat the process to make outline and emissive textures for the rest of the set – and you're done!
🗺️ How the maps combine
Often the outline diffuse and emissive maps should be opposites (white and transparent become black, black becomes white or transparent). Depending on what you want to achieve they might not follow that pattern, I've made a handy chart to help clarify when you should use black, white or transparent in each map.
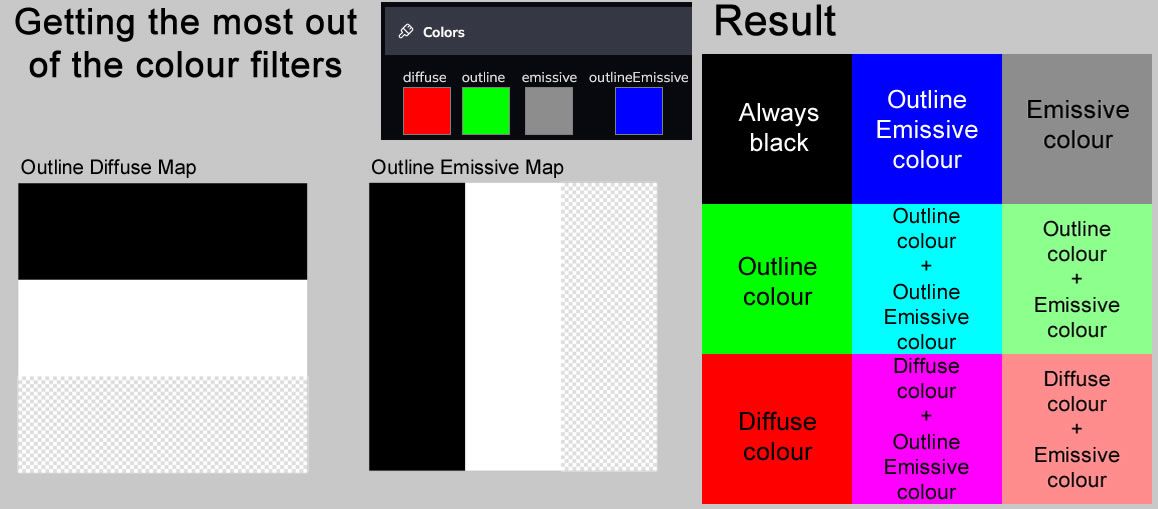
Keep in mind that if emissive colours are allowed to mix with the diffuse/outline colours, the darker the emissive colour is, or the brighter the diffuse/outline colour is, the weaker the effect.
🎲 Conclusion
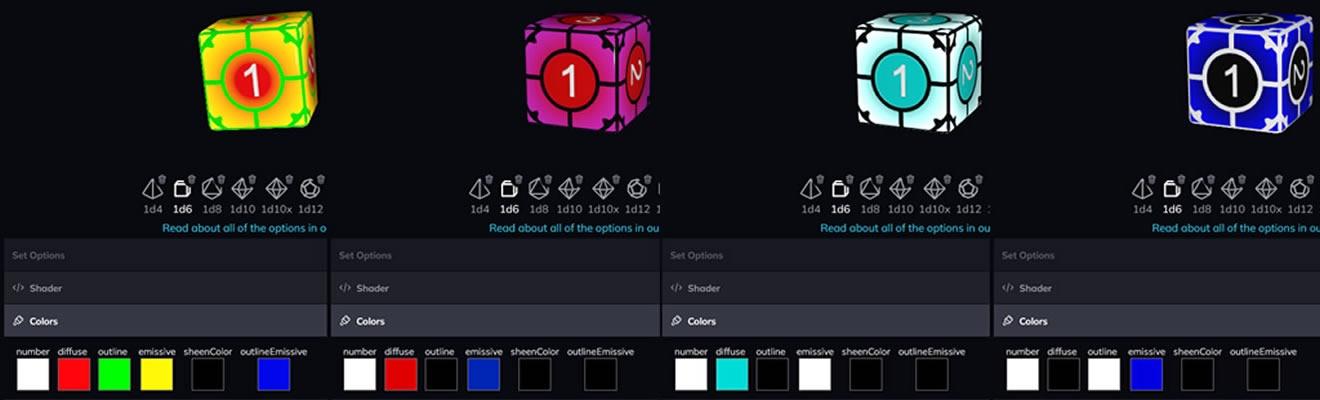
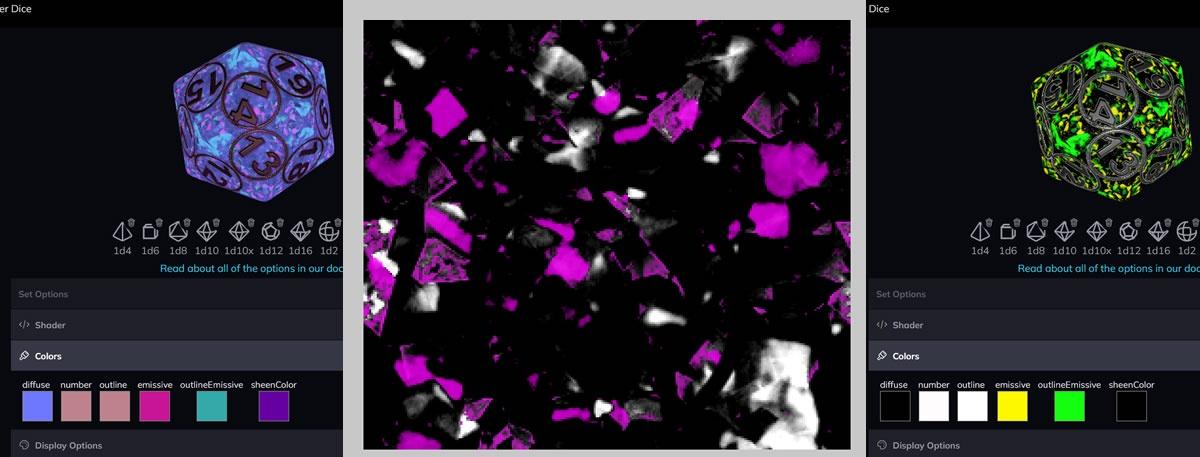
The Poison Envy dice set uses a simple gradient, so the outline and emissive maps weren't too difficult to make. A more complicated arrangement of colours – such as the Star Teller set – just means you need more detailed map textures.
If you're decent at image editing, you should be able to filter out specific colours from the original coloured texture to be black/white/transparent without too much difficulty. Here we can see how the emissive map is applied. The transparent parts show on the dice as pink/yellow, and the white parts show as cyan/green.
I hope this helps with your dice making!
This is a guest post written by NatoPotato, one of our featured community dice creators. You can check out all his dice on his creator page and give them a remix, send him a discord friend request @nat0p0tat0 (zeros, not ohs), or check out his steam workshop creations!